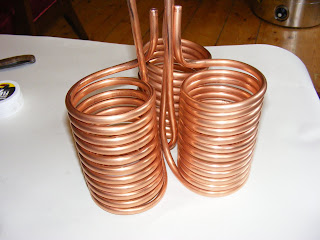
My current method of chilling wort after boiling is to lower a smaller pan full of iced water into the boiler, changing the water once it warms up. Hardly ideal, and it takes quite some time to get the boiling sugar solution down to pitching temperature.
To improve matters, last weekend I finally got my act together to do something with the copper that's been sitting in a cardboard box on top of the wardrobe for about a month.
 |
| The components gathered |
 |
| Dry assembly of cold feed and output arms |
 |
Cold feed arm soldered and positioned for size check.
The manifold is almost exactly over the centre of the boiler; result! |
 |
| A close up of some rather untidy soldering |
 |
| Forming the coil around a handy tool |
 |
| The first coil - approx 3m of 8mm pipe in 12 turns |
 |
| Two more completed |
 |
| The finished article |
 |
| Top right coil is a bit skew-whiff, but it'll do the job |
Once it was all assembled, I boiled 25 litres of water. Cooling to 20°C took 20 minutes, which is pretty good, especially as the specific heat capacity of water is higher than that of wort. I can expect quicker results as the gravity goes up, especially for winter brews when the Edinburgh water supply comes into the flat barely above freezing.
Its first real-world run will probably be a premium bitter for the
Thornbridge/
Nicholsons homebrewing competition. More on that in due course.


A larger radius with a bigger pitch between the turns may also help as the area exposed to the moving ( cooling ) liquid would be increased. The tightness of the wrap may be impeding good thermal contact and the copper could just be maintaining its own temperature.
ReplyDeleteStretch the coils vertically more if you dont want to do a re-wrap.